Pump, Connect & Kite
Why it is essential to pump the kite and connect the lines properly
After some
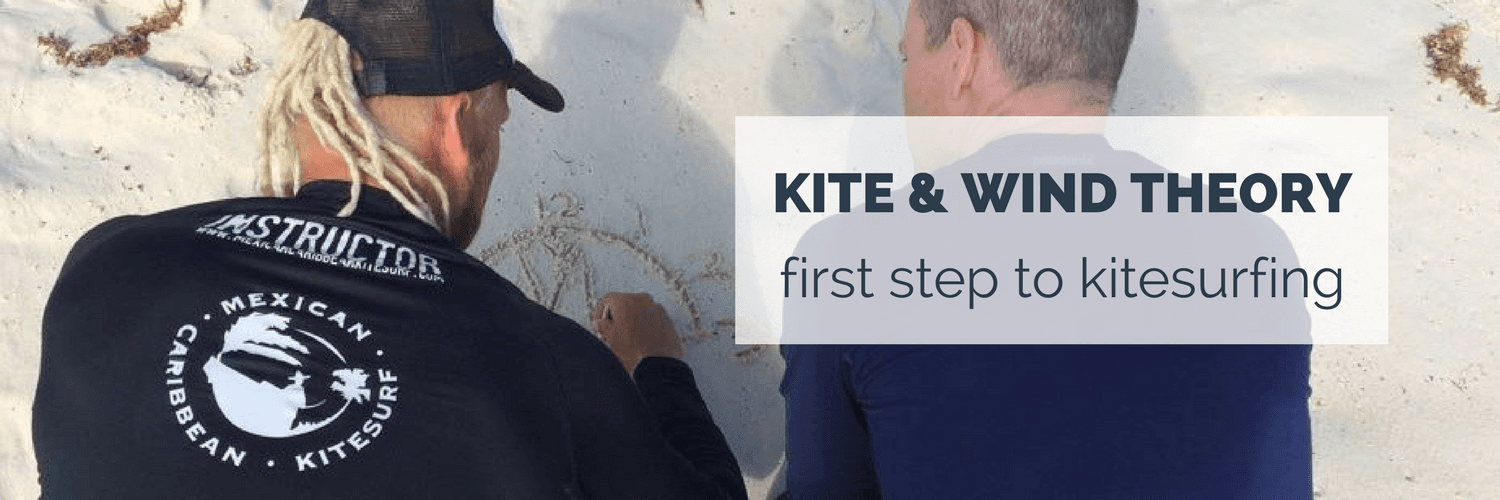
Kite & Wind Theory
(STEP 1)
, it's time to STEP 2: Kite and lines set up
. So, let's take out the kite, pump it, connect the lines and prepare the gear to fly.
There are two essential parts here: (I) Pumping the kite and (II) Connecting the lines
It might seem pretty easy, right? But learning to pump the kite in the right position will avoid seeing your kite flying away in front of your eyes. And most important, connecting the lines in the proper way will avoid accidents when launching and flying the kite. So, keep focus in the process.
Please take this just as a brief explanation of what you will learn with your certified instructor on your first day of lessons. Do not miss the first lesson. And never never never try to learn Kitesurf on your own.
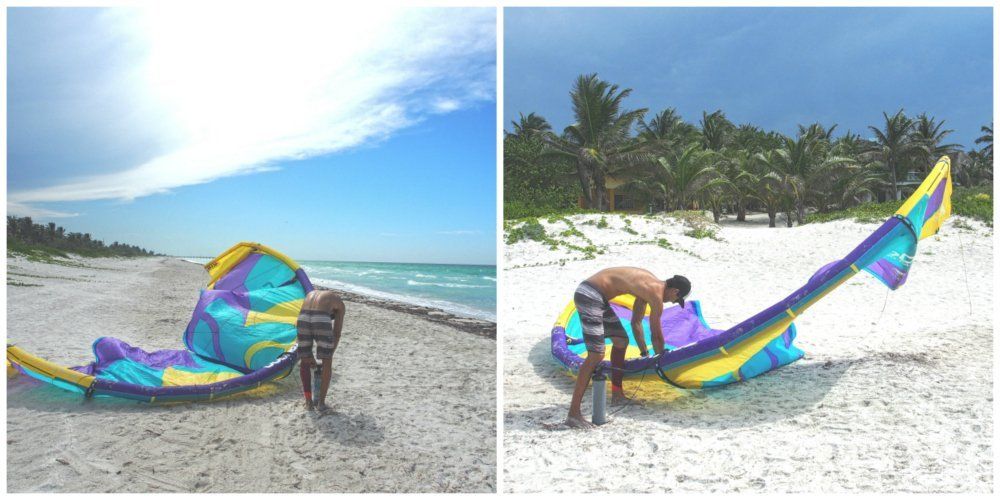
(I) PUMP THE KITE
We'll follow a few steps to inflate the kite in the right position and manner:
1.
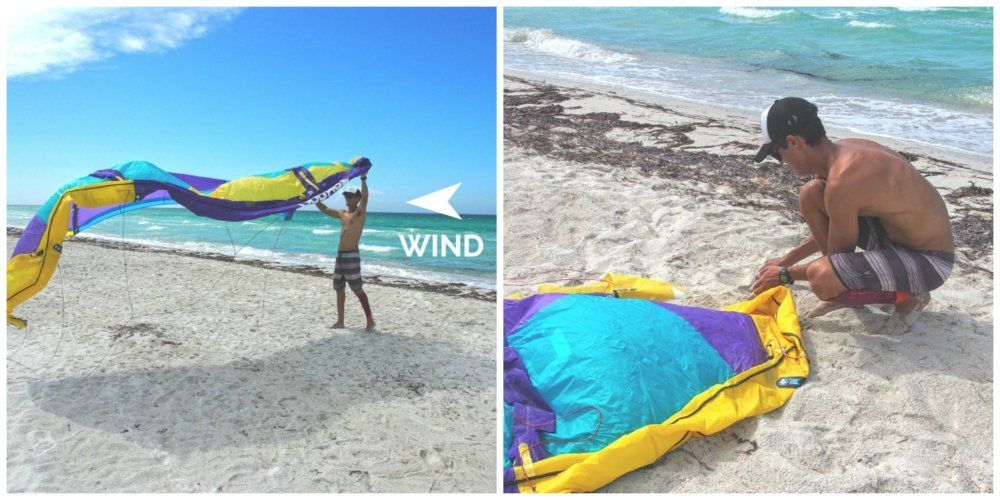
Unroll the kite:
The kite must be unrolled with the wind at your back and the struts facing up. After, you can place some sand on the wing tip closer to you (the most upwind tip).
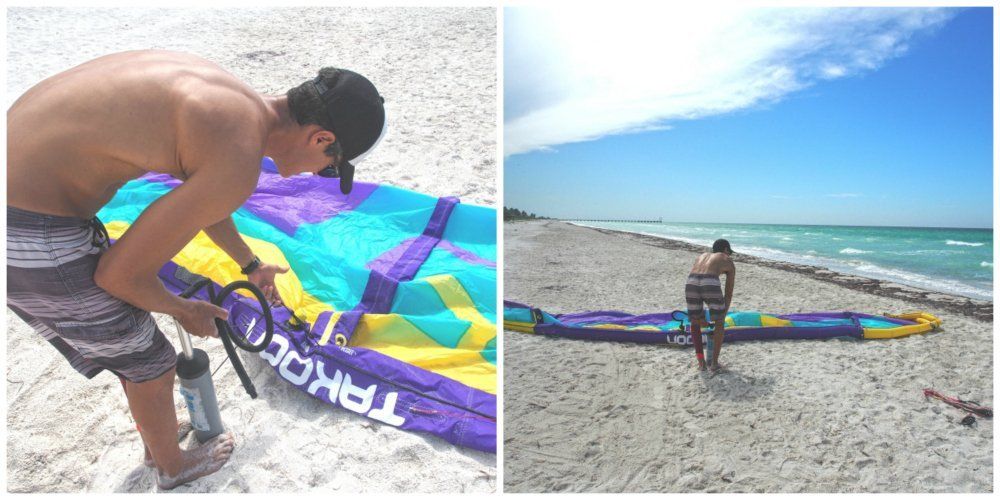
2. Inflate the kite:
Most of the kites have a "one-pump system"
that inflates struts and leading edge at the same time. If this is the case, connect the pump leash to the kite, open the valve and inflate the kite. Connecting the pump leash to the nose of the kite will enable you to pump the kite using both feet and hands without having the kite flying away.
If the kite has no "one-pump system"
, make sure to inflate the struts before the leading edge.
Make sure to pump the kite firm but not over inflated. Then, close the valves and fasten the velcro over the caps.
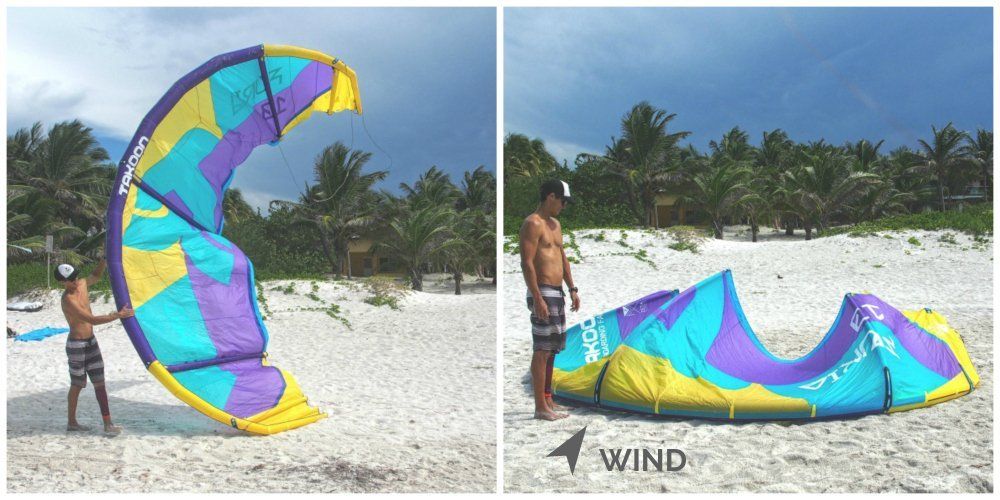
3. Flip the kite:
Take the kite by the leading edge and flip the inflated kite over. The leading edge will face the ground. Make sure that the nose of the kite (the point where center strut and leading edge meet) is facing the wind. Place sand in between struts to prevent it from flying away, and go to connect the lines.
(II) CONNECT THE LINES
It's time to connect the lines following the downwind method
:
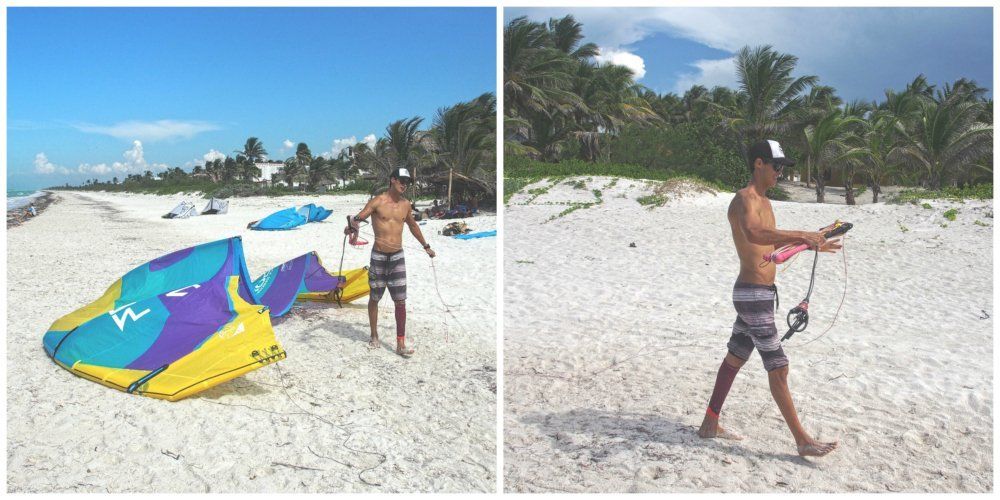
1. Unwind the bar:
Stand up next to the kite with the wind in your back. Hold the bar in the center and begin to unwind the lines. Place the ends of the lines next to the inflated kite on the sand. Continue walking downwind away from the kite unwinding the lines. Avoid to drag the lines along with you. The ends of the lines should remain next to the kite.
2. Place the bar upside down:
With the lines completely unwound place the bar on the sand upside down. This is very important. The left part of the bar must be placed on the right on the ground.
Normally bars are color-coded where the left part is red in the flying position. If this is the case, the red part of the bar should be on the ground on the right side. If your bar is not color-coded, the left side is always marked somehow, sometimes with the kite brand name, other times with different colors.
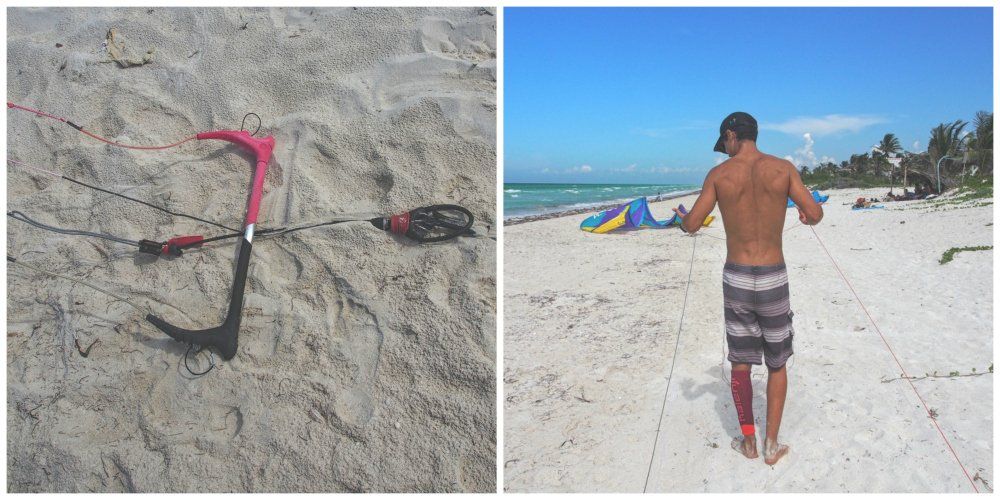
3. Walk out your lines:
Stand in between your lines next to the bar, in a way where the center lines (also called frontline) are between your legs and the two back lines are on each side of your legs. In this position, walk from the bar to your kite straightening any twists and untangling the lines if needed. When you get to the end, place the lines on the ground with the center lines in the center and the back lines on the sides.
It is essential to place the lines with no twists. Any twist or tangles in the lines when connecting them to the kite can be dangerous when launching and flying the kite.
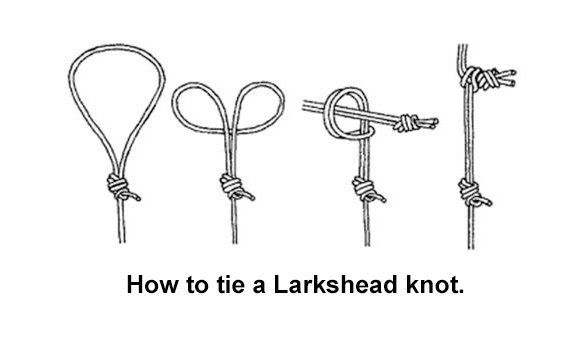
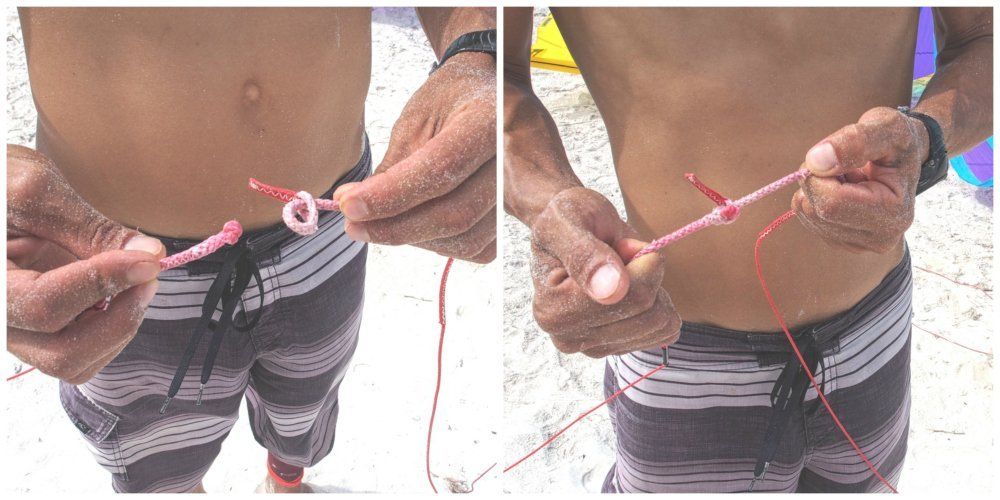
4. Attach the lines: Now is time to attach the flying lines to the kite using the Lark's Head Knot . Please, check below a sequence of the knot. This is a universally used knot in the kitesurfing world. It creates a cinch which can be slipped over the knot on the point of attachment and be tightened.
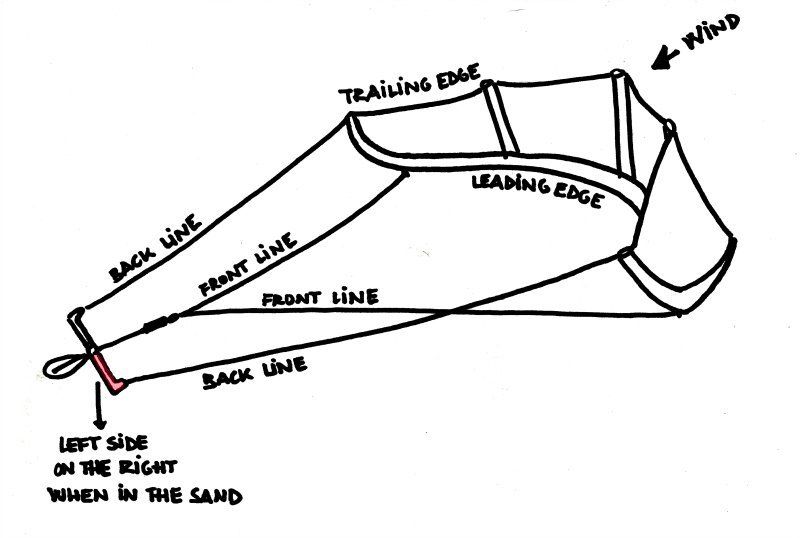
The kite has four line attachment, two on the center of the leading edge (front/inflated edge) and two on the end of the leading edge (back).
Front lines / Center lines will be attached to the center of the leading edge. These lines are equipped with loop extensions to be attached to the fixed-knot pigtails on the leading edge of the kite.
Back lines will be attached to the end of the leading edge. The back lines are equipped with fixed-knots extensions, which can only be attached to the loop pigtails at the end of the leading edge of the kite.
This attachment system makes impossible to attach one back line in the center of the leading edge and vice versa, because they need their opposite pigtails.
At the end the position of the lines when attached to the kite on the ground would look like this.
5. Check the lines:
It is crucial to attach the lines correctly. Otherwise the kite will not fly properly and may be uncontrollable. So, after connecting the lines take your time and check that your lines have been connected properly. There is no rush. You have plenty of time to enjoy your session safely.
To do so, hold the two back lines and walk back from the kite to the bar, making sure the lines are not crossing each other.
Now, you are ready to fly your kite. Before launching your kite you need to flip your bar to the flying position. If your bar is colored-coded, the red part would be on the left side again.
Are you ready for your next step? Feel free to ask any questions and please be focus when connecting your lines.
*** SUMMARY ***
STEP:
2 - Kite & lines set up
DURATION APPROX:
20 minutes
WHY IS IMPORTANT:
Because pumping your kite in the right position
will avoid your kite of flying away.
And because attaching the lines properly
will avoid any accident when launching and flying the kite.
NEXT STEP:
3 - Inner-workings of the bar & safety systems